Has your trusty slow cooker lid handle given up the ghost? It’s a common frustration when that essential part breaks, making it difficult and even unsafe to lift the lid. Before you consider replacing your entire slow cooker, pause! Fixing a broken lid handle is often a simple, cost-effective, and deeply satisfying DIY project that can extend the life of your beloved appliance.
What Causes Slow Cooker Lid Handles to Break?
|
Our Picks for the Best Slow cooker in 2026
As an Amazon Associate I earn from qualifying purchases.
|
||
| Num | Product | Action |
|---|---|---|
| 1 | Crock-Pot 7 Quart Oval Manual Slow Cooker, Stainless Steel (SCV700-S-BR), Versatile Cookware for Large Families or Entertaining |

|
| 2 | Ninja MC1101 Foodi Everyday Possible Cooker Pro, 8-in-1 Versatility, One-Pot Faster Cooking Replaces 10 Tools, Family-Sized Capacity with Adjustable Temp Control, 6.5 quarts, Midnight Blue |
|
| 3 | Crock-Pot Large 8-Quart Programmable Slow Cooker with Auto Warm Setting Black Stainless Steel |
|
| 4 | Ninja® 12-in-1 PossibleCooker™ PLUS - 8.5-qt - Sous Vide & Proof Multi-Cooker - Slow Cooker, Dutch Oven & More - Glass Lid & Integrated Spoon - Nonstick - Oven Safe Pot to 500°F - Black - MC1010 |
|
| 5 | Ninja MC1001 Foodi PossibleCooker PRO 8.5 Quart Multi-Cooker, with 8-in-1 Slow Cooker, Dutch Oven, Steamer, Glass Lid Integrated Spoon, Nonstick, Oven Safe Pot to 500°F, Sea Salt Gray |
|
| 6 | Slow Cooker 10-Quart - PFOA-Free Ceramic Coating, Oven Safe to 450°F - Keep Warm Function for Large Family Gatherings (Includes Silicone Spoon) |
|
| 7 | Hamilton Beach 6-Quart Slow Cooker with 3 Cooking Settings, Dishwasher-Safe Stoneware Crock & Glass Lid, Silver (33665G) |
|
| 8 | Hamilton Beach Slow Cooker, Extra Large 10 Quart, Stay or Go Portable With Lid Lock, Dishwasher Safe Crock, Black (33195) |
|
| 9 | Crock-Pot 6 Quart Cook & Carry Programmable Slow Cooker with Digital Timer Stainless Steel (CPSCVC60LL-S) pack of 1 |
|
| 10 | Crock-Pot 6 Quart Programmable Slow Cooker with Timer and Auto Food Warmer Setting, Stainless Steel |
|
Slow cooker lid handles, often made from plastic or bakelite, endure a lot of stress. They are constantly exposed to high heat and steam, then quickly cooled, leading to material fatigue over time. The repeated lifting and setting down, coupled with the pressure from internal screws, can cause the plastic to become brittle and eventually crack or snap right off. Many original handles use adhesive that isn’t always sufficient for the constant temperature fluctuations, contributing to their failure.
Manufacturers frequently don’t offer replacement lids or handles as individual parts, leaving owners in a predicament. This lack of readily available original equipment manufacturer (OEM) replacements is precisely why DIY solutions have become so popular and necessary for slow cooker enthusiasts.
Is a DIY Repair Worth It?
Absolutely! A DIY repair for your slow cooker lid handle offers several compelling advantages. First and all foremost, it’s significantly more cost-effective than purchasing a brand-new lid or an entirely new slow cooker. For just a few dollars in hardware, you can often restore full functionality. Beyond the financial savings, repairing rather than replacing is an environmentally conscious choice, reducing waste and extending the lifecycle of your appliance. There’s also immense personal satisfaction in tackling a household repair yourself, demonstrating ingenuity and resourcefulness. You might even end up with a handle that’s more durable than the original!
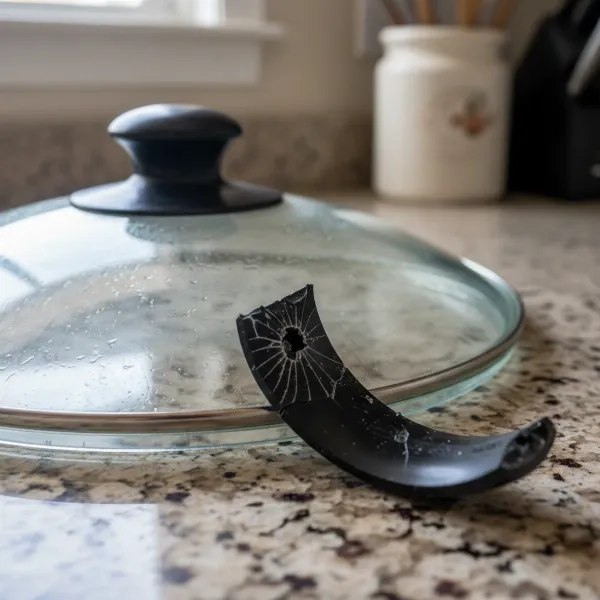 Close-up of a slow cooker lid with a broken plastic handle, showing cracks.
Essential Tools and Materials for Your DIY Handle Repair
Before you begin, gather the right tools and materials to ensure a smooth repair process. Most items are commonly found in household toolkits or local hardware stores.
- Screwdriver: A Phillips head or flathead, depending on the existing screw.
- Pliers: Needle-nose pliers are particularly useful for gripping small nuts.
- Drill with a 1/4-inch bit: Necessary if you need to enlarge an existing hole or create a new one for a larger screw.
- Replacement Knob/Handle:
- Universal Replacement Knob: These are widely available online or at appliance parts stores and are often designed from heat-resistant materials like bakelite.
- Drawer Pull/Cabinet Knob: A sturdy, heat-resistant decorative knob from a hardware store can make an excellent and stylish replacement.
- Wood or Polymer Clay: For a truly custom look, you can craft your own handle, though ensure any custom materials are heat-safe.
- Fasteners:
- 1/4-inch Screw and Bolt: Opt for stainless steel for durability and rust resistance. Ensure the screw is long enough to pass through your lid and the new handle securely.
- Washers: Essential for protecting the glass lid. Use plastic, felt, silicone, or rubber washers on both sides of the glass to prevent direct contact with metal and absorb pressure when tightened.
- Heat-Resistant Adhesives (Optional): For minor cracks in an existing handle, or to reinforce parts, consider JB Weld (a strong, heat-resistant epoxy) or Sugru (a moldable, heat-safe glue). Always check temperature ratings.
Step-by-Step Guide: Replacing a Bolt-On Lid Handle
The most common and reliable method for repairing a broken slow cooker lid handle is to replace it with a new knob secured by a screw and bolt. This method ensures a strong, long-lasting fix.
Assess the Damage and Gather Supplies
First, examine your broken handle. Is it simply the plastic knob that snapped off the screw, or is the entire assembly missing? Confirm you have all the necessary tools and materials listed above before you begin. For instance, a 1/4-inch screw and bolt pack can be purchased for under a dollar at many retailers if you don’t have suitable ones readily available.
Remove the Old Handle (if remnants exist)
If parts of the old handle assembly are still attached, you’ll need to remove them.
- Flip the slow cooker lid over so the inside surface faces up.
- Use needle-nose pliers to hold the bolt or nut on the inside of the lid.
- With your other hand, use a screwdriver to unscrew the screw from the top of the lid.
- Carefully remove any remaining pieces of the old handle, screw, and washers. Scrape off any old, brittle adhesive that might be clinging to the lid surface.
Prepare the Lid for the New Handle
Most slow cooker lids already have a pre-drilled hole in the center.
- Place the lid on a soft, stable surface, such as a towel, to protect the glass from scratches.
- If the existing hole is too small for your new screw, or if you’re creating a new custom attachment point (though generally not recommended for glass lids), carefully drill a 1/4-inch hole in the center.
- Expert Tip: “When drilling into glass, start with a smaller pilot hole and gradually increase the size. Use a glass or tile drill bit and keep the area wet to prevent cracking.” – J.P. Morgan, Self-Proclaimed Carpenter/Handyman
- Ensure the area around the hole is clean and free of debris.
Attach the New Handle Securely
This is where your new handle takes shape!
- From the inside of the lid, insert a plastic or felt washer over the screw hole.
- Next, insert your new screw through the washer and the hole in the glass lid, so the screw points upwards from the top of the lid.
- Place another plastic or felt washer over the exposed screw on the top of the lid. These washers are crucial for creating a buffer against the glass and preventing over-tightening damage.
- Carefully place your new handle (whether it’s a universal knob, a drawer pull, or a custom piece) onto the screw.
- Thread the bolt onto the screw and twist it by hand until it’s snug.
- Using needle-nose pliers, hold the bolt firmly in place on the underside of the lid.
- With your screwdriver, gently tighten the screw from the top. Do not over-tighten, as this can crack the glass. The goal is a secure, stable handle, not a super-tight one.
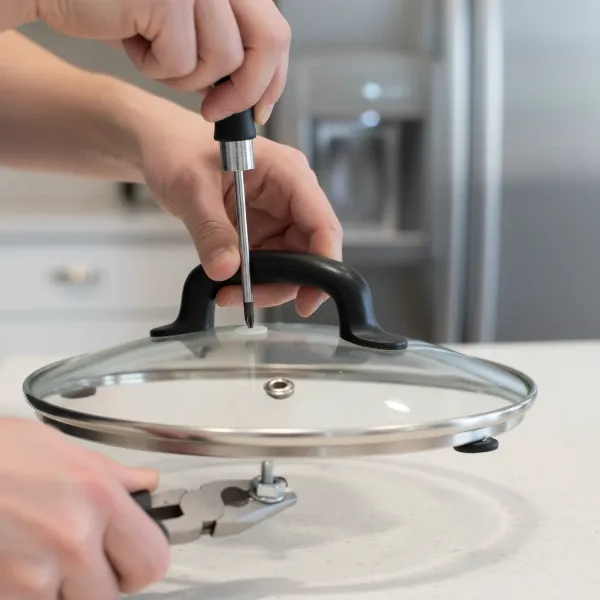 Hands attaching a new handle to a slow cooker lid with a screw and washers.
Test for Stability and Safety
Once the handle is installed, give it a gentle tug to ensure it’s secure. Lift the lid a few times to get a feel for the new handle. It should feel stable and comfortable to grip.
Alternative DIY Repair Methods
While a bolt-on replacement is often the most robust solution, other creative methods can work for specific types of damage or for a unique aesthetic.
Reinforcing with Heat-Resistant Adhesives
For handles with minor cracks that haven’t fully detached, or if you need to reattach a small piece, a strong, heat-resistant adhesive can be effective.
- JB Weld: This two-part epoxy is renowned for its strength and high-temperature resistance (often up to 500-600°F). It’s excellent for bonding metal, plastic, and glass. Apply carefully, following the manufacturer’s instructions, and allow ample curing time.
- Sugru: A moldable glue that turns into rubber. It’s heat-safe up to 350°F (180°C) and can be molded around existing breaks to create a new, durable grip or reinforce weak points.
Creative Replacements: Drawer Pulls & Custom Handles
If you want a handle with character, consider repurposing other items. Many DIY enthusiasts have successfully used wooden drawer pulls as stylish and functional replacements. You can even paint and seal a wooden drawer handle to match your kitchen decor. If using wood, ensure it’s a dense, heat-resistant type and consider a heat-resistant sealant. One creative individual crafted a polymer clay handle, which, while aesthetically pleasing, requires careful consideration of its temperature limits (typically under 275°F/135°C, making it suitable for slow cooker lids but not for oven use).
Important Safety Considerations for Slow Cooker Lid Repairs
Safety should always be your top priority when repairing kitchen appliances.
- Heat Resistance: All materials used – including handles, washers, screws, and especially adhesives – must be rated for high temperatures. Slow cooker lids get very hot, and non-heat-resistant materials can melt, off-gas, or fail, potentially contaminating food or causing burns.
- Food Safety: Ensure any adhesives or coatings you use are food-safe or will not come into direct contact with food.
- Avoiding Overtightening: Glass lids are durable but can crack under excessive pressure. Tighten screws just enough so the handle is secure, but avoid forceful torquing.
- Thorough Testing: Always test your repaired lid for stability before using it for cooking, especially with hot food.
When to Consider a New Lid or Slow Cooker
While DIY repairs are often effective, there are instances where a full replacement might be necessary:
- Extensive Lid Damage: If the glass lid itself is cracked, chipped, or shattered, a handle repair won’t suffice. A damaged lid can compromise heat retention and potentially shatter further, posing a safety risk.
- Repeated Failures: If your handle repair fails multiple times despite your best efforts, it might indicate underlying issues with the lid’s design or material, making a new lid a more practical long-term solution.
- Cost vs. New: Sometimes, the cost of purchasing suitable replacement parts, especially for specialized lids, can approach the price of a generic replacement lid or even an entirely new budget slow cooker. In such cases, a new purchase might be more sensible.
Conclusion
Don’t let a broken lid handle relegate your slow cooker to the back of the cupboard. With a few basic tools and a little determination, you can easily repair it yourself, bringing your beloved appliance back to life. From simple screw replacements to creative custom handles, the power to fix and save is in your hands. Embrace the satisfaction of DIY, keep your slow cooker cooking, and enjoy many more effortless meals. What kind of creative solution will you come up with for your slow cooker lid?
Frequently Asked Questions
Can I use super glue to fix my slow cooker lid handle?
While super glue can reattach some broken plastics, it may not withstand the high heat and moisture inside a slow cooker over time. Heat-resistant epoxies like JB Weld or moldable glues like Sugru are generally more effective for a durable repair due to their higher temperature ratings and stronger bonds.
Where can I buy a replacement slow cooker lid handle?
Universal replacement knobs designed for cookware are available at appliance parts stores, online retailers like Amazon or eBay, and sometimes in the kitchenware section of general merchandise stores. Alternatively, you can repurpose a sturdy drawer pull from a hardware store.
What kind of screw should I use for a slow cooker lid handle?
It’s best to use a stainless steel screw and bolt combination for durability and to prevent rust. A 1/4-inch screw is a common size, but verify it fits your chosen handle and the lid’s existing hole. Always use washers to protect the glass.
Is it safe to use a slow cooker with a repaired lid handle?
Yes, as long as the repair is done correctly with heat-resistant, food-safe materials and the handle feels secure. Ensure there are no sharp edges and that the lid forms a proper seal. Always test the handle’s stability before and during cooking.
Can I make a custom handle for my slow cooker lid?
Absolutely! Many DIYers use wooden cabinet knobs, sturdy branches, or even polymer clay for custom handles. Just be sure that any custom material you choose is heat-resistant and non-toxic, and that it’s securely attached with appropriate hardware to prevent it from loosening during use.