Introduction:
Tired of store-bought soap? Discover the satisfying craft of hot process soapmaking using an accessible slow cooker method. This technique offers quicker use, allows for natural ingredients, and gives you complete control over your soap’s composition.
What is Hot Process Soapmaking?
|
Our Picks for the Best Slow cooker in 2026
As an Amazon Associate I earn from qualifying purchases.
|
||
| Num | Product | Action |
|---|---|---|
| 1 | Hamilton Beach 6-Quart Slow Cooker with 3 Cooking Settings, Dishwasher-Safe Stoneware Crock & Glass Lid, Silver (33665G) |

|
| 2 | Ninja MC1001 Foodi PossibleCooker PRO 8.5 Quart Multi-Cooker, with 8-in-1 Slow Cooker, Dutch Oven, Steamer, Glass Lid Integrated Spoon, Nonstick, Oven Safe Pot to 500°F, Sea Salt Gray |
|
| 3 | Crock-Pot Large 8-Quart Programmable Slow Cooker with Auto Warm Setting Black Stainless Steel |
|
| 4 | Ninja MC1101 Foodi Everyday Possible Cooker Pro, 8-in-1 Versatility, One-Pot Faster Cooking Replaces 10 Tools, Family-Sized Capacity with Adjustable Temp Control, 6.5 quarts, Midnight Blue |
|
| 5 | Crock-Pot 6 Quart Cook & Carry Programmable Slow Cooker with Digital Timer Stainless Steel (CPSCVC60LL-S) pack of 1 |
|
| 6 | Hamilton Beach Slow Cooker, Extra Large 10 Quart, Stay or Go Portable With Lid Lock, Dishwasher Safe Crock, Black (33195) |
|
| 7 | Crock-Pot 6 Quart Programmable Slow Cooker with Timer and Auto Food Warmer Setting, Stainless Steel |
|
| 8 | Slow Cooker 10-Quart - PFOA-Free Ceramic Coating, Oven Safe to 450°F - Keep Warm Function for Large Family Gatherings (Includes Silicone Spoon) |
|
| 9 | Ninja® 12-in-1 PossibleCooker™ PLUS - 8.5-qt - Sous Vide & Proof Multi-Cooker - Slow Cooker, Dutch Oven & More - Glass Lid & Integrated Spoon - Nonstick - Oven Safe Pot to 500°F - Black - MC1010 |
|
| 10 | Crock-Pot 7 Quart Oval Manual Slow Cooker, Stainless Steel (SCV700-S-BR), Versatile Cookware for Large Families or Entertaining |
|
Hot process soapmaking is a method where the saponification process (the chemical reaction between lye and oils that creates soap) is accelerated by applying heat. This differs from cold process (CP) soapmaking, where the reaction occurs slowly at room temperature. Hot process soaps are ready for use much faster than cold process soaps, which require a longer cure time. While cold process soaps often have a smoother finish, hot process soaps typically exhibit a more rustic texture. A key advantage of hot process is the flexibility to add delicate ingredients like essential oils, fragrance oils, and colorants after the main cook, preserving their integrity and scent. This method is ideal for beginners or anyone seeking immediate results from their soapmaking efforts.
Safety First: Handling Lye in Soapmaking
Lye, or sodium hydroxide, is an essential ingredient in all true soapmaking. Without it, oils cannot turn into soap. However, lye is a caustic substance and requires crucial safety precautions. Always wear personal protective equipment (PPE), including gloves, safety goggles, and long sleeves, to protect your skin and eyes from splashes. Ensure you work in a well-ventilated area, preferably outdoors or near an open window. Remember the critical rule: “Lye to Water, Never Water to Lye,” meaning you always add lye slowly to distilled water, never the other way around, to prevent a dangerous exothermic reaction. In case of a lye spill, a vinegar solution can help neutralize it.
Essential Equipment and Ingredients
To embark on your hot process soapmaking journey, gather the following:
Equipment:
- Slow cooker (dedicated for soapmaking only to avoid cross-contamination with food).
- Digital scale (for precise weighing of ingredients, crucial for safety and successful soap).
- Stick blender (immersion blender) for achieving trace quickly and efficiently.
- Heat-resistant containers (stainless steel or heavy-duty plastic are suitable; avoid glass for lye solutions due to potential for thermal shock and breakage).
- Soap molds (silicone molds are easy to use; wood molds require lining).
- Safety gear (gloves, goggles, long sleeves, mask).
- Thermometer (an infrared thermometer is recommended for contactless temperature checks).
Ingredients:
- Base oils (e.g., Coconut Oil for hardness and lather, Olive Oil for moisturizing properties; a basic recipe might include a blend of these).
- Distilled water (essential for dissolving lye and ensuring purity).
- 100% pure Sodium Hydroxide (Lye).
- Optional additions: Essential oils/fragrance oils for scent, natural colorants (like clays or botanicals), exfoliants (such as oatmeal or poppy seeds), and superfatting oils (added at the end to enhance moisturizing).
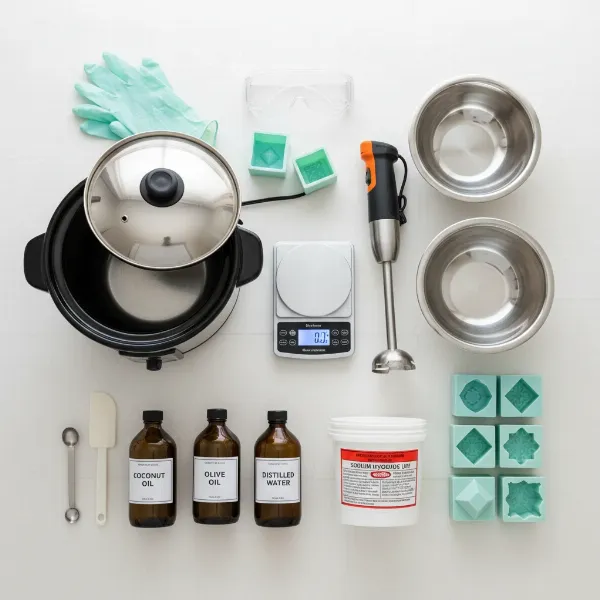 Essential equipment for hot process soapmaking including slow cooker, scale, stick blender, molds.
Step-by-Step Guide to Making Hot Process Soap
Step 1: Preparation is Key
Set up your workspace in a well-ventilated area. Don your safety gear. Prepare your soap molds by ensuring they are clean and ready. Accurately weigh all your oils, water, and lye using your digital scale. Precision is paramount in soapmaking.
Step 2: Create the Lye Solution
Carefully add the weighed lye pellets or flakes slowly to your weighed distilled water in a heat-resistant container. Stir gently until the lye is fully dissolved. This solution will become very hot; place it in a safe, ventilated area to cool down while you prepare your oils.
Step 3: Heat the Oils
Melt any solid oils (like coconut oil or shea butter) in your slow cooker on a low setting. Once melted, add your liquid oils (such as olive oil or sunflower oil) to the slow cooker and gently mix them.
Step 4: Combine Lye and Oils (Trace)
Once your lye solution has cooled sufficiently (typically within 10-20 degrees Fahrenheit of your oils), slowly and carefully pour the lye solution into the warm oils in the slow cooker. Using your stick blender, blend the mixture in short bursts, alternating with stirring, until it reaches “trace” – a point where the mixture thickens enough to leave a temporary mark on the surface when you drizzle some soap from the blender.
Step 5: Cook the Soap
Cover the slow cooker with its lid and cook the soap on a low setting. Monitor the soap closely as it goes through several stages:
- Applesauce stage: The mixture will look like thick applesauce, separating slightly.
- Mashed potato stage: It will thicken further and resemble mashed potatoes.
- Gel phase/Translucency: The soap will begin to become translucent around the edges and move towards the center, indicating saponification is actively occurring. This is the “gel phase.”
- Prevent “soap volcanoes” by stirring the soap if it starts to bubble up too much, which can happen if the heat is too high or the pot is too full. Continue cooking until the entire batch is translucent and resembles petroleum jelly, signifying that saponification is complete.
Step 6: Add Extras
Once the soap is fully cooked, turn off the slow cooker. This is the perfect time to add superfatting oils (if not calculated into the main recipe), essential oils or fragrance oils, natural colorants, or exfoliants. Stir them in thoroughly but quickly.
Step 7: Mold and Cool
Scoop the hot, thick soap into your prepared molds. Because hot process soap is very thick, you’ll need to press it down firmly to eliminate air pockets and ensure an even distribution. Smooth the top if desired. Allow the soap to cool and harden in the molds for 12-24 hours.
Step 8: Unmold, Cut, and Cure
Once firm, unmold the soap. If using a loaf mold, cut the soap into individual bars. Hot process soap is technically ready to use immediately after cooling, as saponification is complete. However, a brief drying or “curing” time of 1-2 weeks allows excess water to evaporate, resulting in a harder, longer-lasting bar with a milder lather.
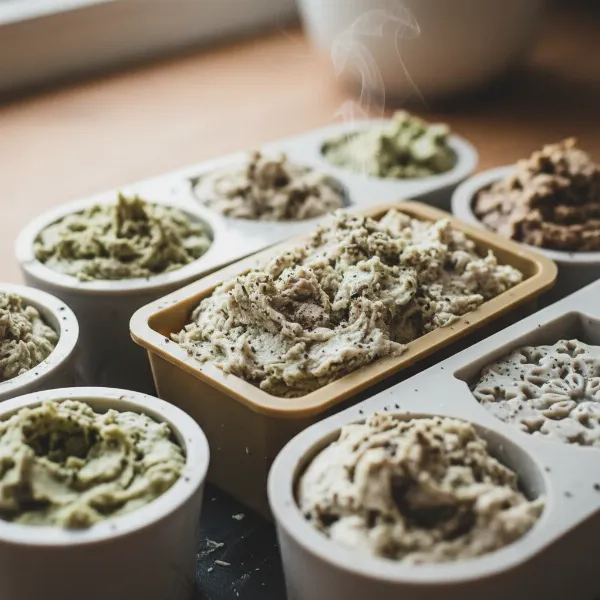 Freshly molded hot process soap bars cooling in silicone molds, ready for unmolding.
Troubleshooting Common Hot Process Soapmaking Issues
- “Soap Volcano” / Bubbling Over: This usually indicates the heat is too high or the slow cooker is too full. Reduce heat and stir gently to calm the reaction.
- Dry, Crumbly Soap: This can happen if the soap cooks too long or is too hot. If still warm, you might be able to rehydrate it with a small amount of distilled water or a superfatting oil and gently stir.
- Soft, Oily Soap: Often a result of incorrect lye calculations, inaccurate weighing, or superfatting too high. Double-check your recipe and measurements for future batches.
- Separation: This can occur if the lye and oils weren’t fully emulsified at trace, or if the temperature was inconsistent. Continue blending if it separates before cooking.
- Color/Fragrance Fading: Many essential oils and delicate colorants can degrade with heat. Always add these after the main cook is complete and the slow cooker is turned off to preserve their potency.
Tips for Perfect Hot Process Soap Every Time
- Use a lye calculator: Always use a reliable lye calculator to formulate new recipes or adjust existing ones. This ensures the correct lye amount for safe and balanced soap.
- Use dedicated equipment: To prevent any risk of lye or soap residue contaminating food, use equipment solely for soapmaking.
- Don’t rush the cook: Allow the soap to go through all its stages of saponification completely. Patience leads to better soap.
- Experiment with additives: Once comfortable with the basic process, explore different essential oils for soap, fragrance oils for soap, natural colorants, and exfoliants.
- Proper storage for curing: Store your curing soap bars in a cool, dry place with good air circulation.
Conclusion:
Hot process soapmaking offers a rewarding and efficient way to create natural, customized soap. Its quick turnaround time makes it an excellent choice for those eager to use their creations sooner. We encourage you to try this accessible method and experience the joy and benefits of homemade soap, contributing to a more natural lifestyle.
Frequently Asked Questions
- Can I use my slow cooker for food again? No, it is highly recommended to dedicate a slow cooker for soapmaking only to prevent any potential contamination with lye residue.
- How long does hot process soap need to cure? While technically usable immediately, a 1-2 week cure time is recommended for hot process soap to allow excess water to evaporate, resulting in a harder, longer-lasting bar.
- What is “trace” in soapmaking? Trace is the point during the soapmaking process when the oils and lye solution have emulsified to a degree where the mixture has thickened, and a drizzle of soap on the surface leaves a temporary mark.
- Why is lye necessary for soap? Lye (sodium hydroxide) is essential because it is the alkali component that reacts with the fatty acids in oils through a process called saponification, chemically transforming them into soap. Without lye, it’s not true soap.
- Can I use milk instead of water? Yes, you can use milk (like goat milk for soap) instead of water, but it requires special precautions due to the sugars in milk potentially scorching or reacting with lye. It’s often frozen first.
- What temperature should my oils and lye solution be? While hot process is more forgiving with temperatures than cold process, generally aiming for oils and lye solution to be between 140°F and 180°F (60°C and 82°C) when combined is a good starting point.